Ethernet is the fastest, most reliable, and most secure way to get online. However, if your wired connection isn’t performing as it should as you are getting an intermittent connection, don’t worry—there are a few simple checks you can do yourself before reaching out for support.
This guide will walk you through step-by-step troubleshooting for intermittent Ethernet issues. If the problem continues after trying these fixes, you’ll also find details on how to contact our support team.
Troubleshooting steps - Click a header below to expand and see more details
Step 1: Check if Your Device is Logged In or Linked
When you first connect a new device, you should be automatically redirected to the Glide sign-in page where you can link it to your account. Make sure you’ve completed this step.Using a device without a web browser?
Some devices (like smart TVs or game consoles) can’t sign in directly. In this case, you’ll need to manually add the device to your account using its MAC address. |
 |
Step 2: Test All Available Sockets
| Depending on your room, there may be more than one wall port. Not all ports are active, so try plugging your cable into each socket to rule out port issues. |
 |
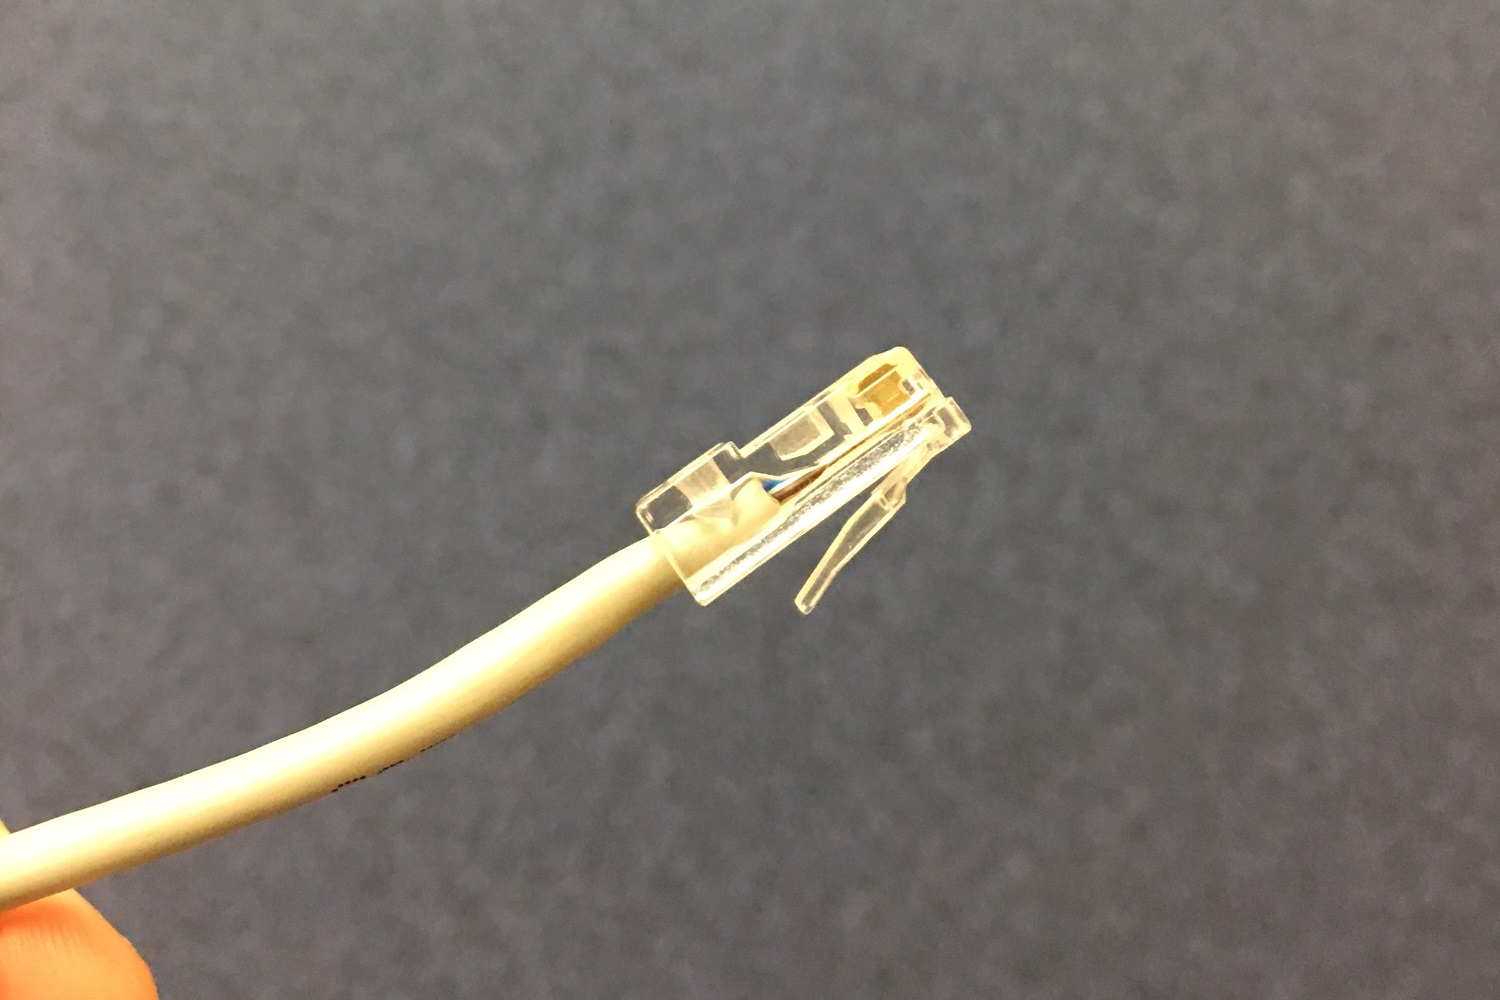
Step 3: Try a New Cable
Even if your current cable has worked before, it may have become damaged—and still appear to be in good condition. To rule this out, please try using a different Ethernet cable.Don’t have a spare?
Visit your reception desk—they may be able to provide a cable for testing purposes. |
 |
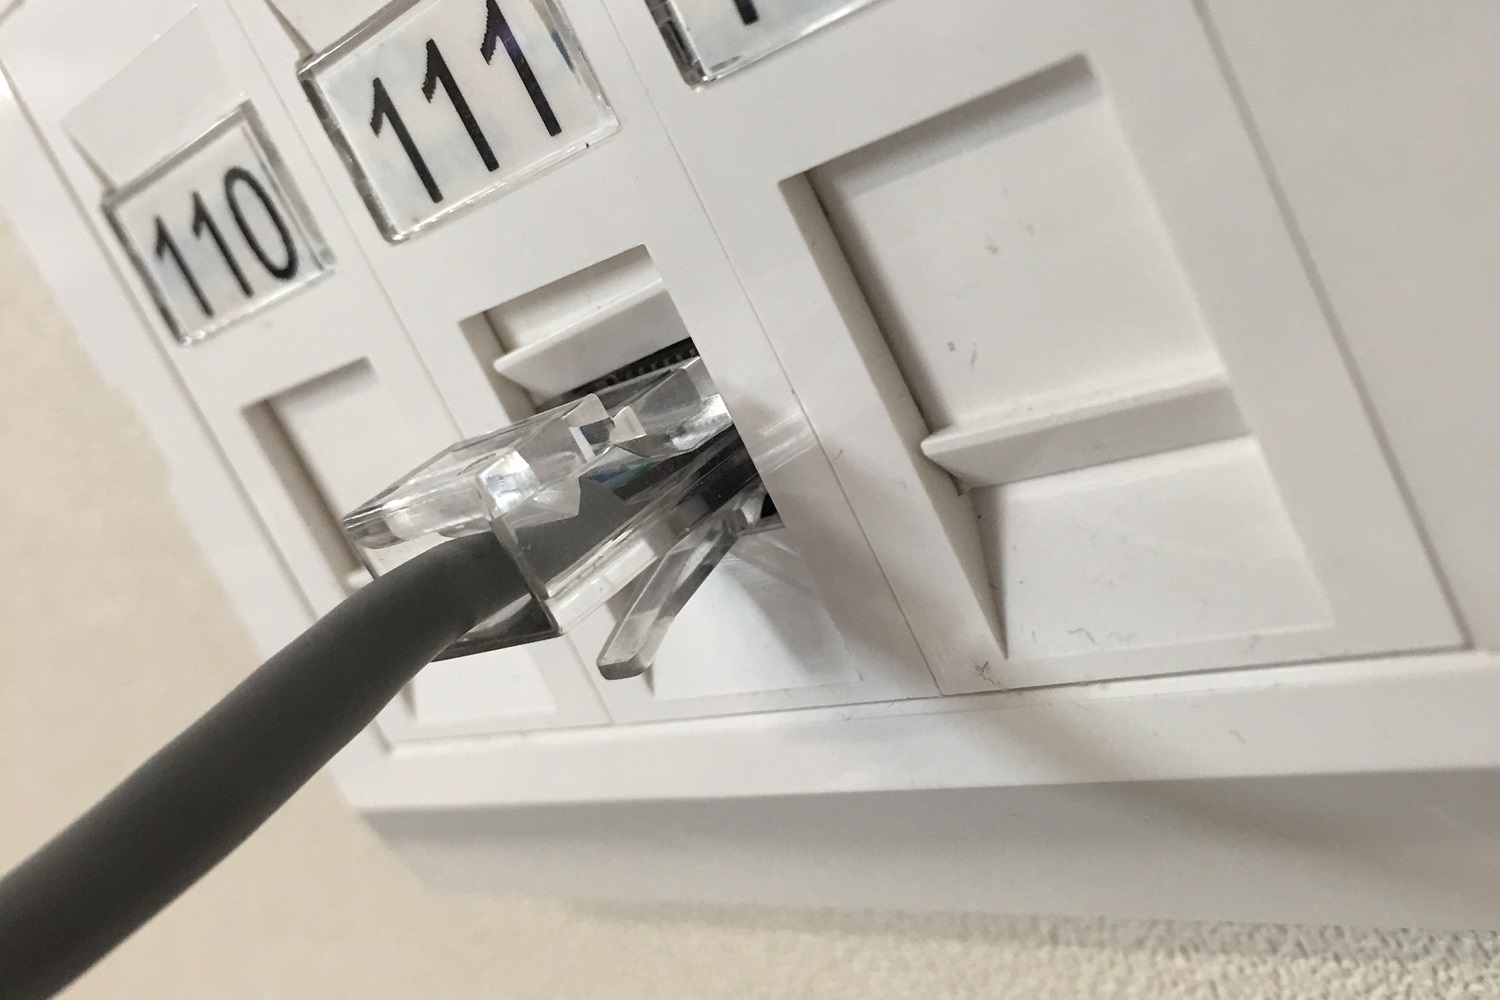
Step 4: Check for Port Damage
Inspect the LAN faceplate closely. Look for any visible cracks, loose parts, or other signs of damage.If everything looks fine from the outside, gently open the flap of the LAN port using one finger (if it has one). This flap should push down easily. Check the following:
- Are the copper pins inside visible and undamaged?
- Does the cable click in securely when plugged in?
If you believe the port is damaged or loose, please contact the Glide Support Team: studentsupport@glide.co.uk |
|
Step 5: Perform a Network Reset
|
A network reset can help resolve issues caused by incorrect or outdated network settings on your device. The steps vary depending on the device, but you can usually find them by searching online for "[Your Device] + Network Reset."
Windows (10 & 11)
- Open Settings
- Go to Network & Internet
- Scroll down and click Advanced network settings
- Select Network reset
- Click Reset now, then Yes to confirm
- Your computer will restart automatically
This will remove and reinstall all your network adapters and reset settings to default.
MacOS (Apple Computers)
- Open System Settings (or System Preferences on older versions)
- Go to Network
- Select your Ethernet connection
- Click the minus (-) icon to remove the network
- Click Apply
- Then, click the plus (+) icon to add it back
- Select Ethernet (or Wi-Fi), click Create, and then Apply
- You can also restart your Mac after this for a full refresh
|
|
Step 6: Winsock Reset (Windows only)
|
Windows only:
-
Open Command Prompt as Administrator
-
Type: netsh winsock reset
-
Press Enter and restart your computer
|
|
Contact the Service Desk
If the issue persists, we will need to speak with you in order to work out the best way to improve the connection. You can either call us on 0333 123 0115, or alternatively you can email us some information, and we’ll contact you.
First, we need to you capture some data from a laptop or desktop when the connection is not working.
Next, consider the following questions:
-
Has the connection ever worked without issue?
-
If so, when did this issue start?
-
Have you tried another Ethernet cable?
-
Are you using any personal networking equipment e.g. a router or switch/splitter?
-
Does your device work without issue on the port in another room?
-
What happens when you're disconnected? Does your computer show any warnings or messages over the network icon?
-
Are you being shown any warnings or messages from your operating system or within your internet browser?
Please send these screenshots as attachments, along with the answers to the above questions in an email to us, and we will endeavour to get in touch as soon as we can. Alternatively, you can contact us using the form below, and send the attachments when prompted later on. You must include either your Username or Account ID in the email.